
Installing a Low-Cost SDR at Home
An easy way to get started is the purchase an RTL-SDR and use one of the free software packages available like SDR++ or SDR# (note 1). Each of these programs support an array of SDR devices.
The RTL-SDR v3 is ideal for a simple SDR station because it is cheap, reliable, widely available and arguably the best supported:
The RTL-SDR is connected to the PC by simply plugging it into a USB interface. These are USB 2.0 and use a USB Type-A physical connector. The connector can be seen on the right side of the image.
The antenna connector (the gold-colored connector on the left side of the image) is a female SMA.

Due to the popularity of the RTL-SDR hardware, you can select from a huge number of good SDR applications. You may have seen the OpenWebRX+ software we use for the HF Bench. If you have a Linux box (a Raspberry PI works great) you can download and install it yourself pretty easily. OpenWebRX/OpenWebRX+ both support a wide selection of SDRs and they are highly configurable.
We'll talking about SDR++, which is a relative newcomer. It will give us an easy to use listening station. It lacks the digital decoder capabilities of other software.
You can download installers for Windows and Debian-based Linuxes (like Ubuntu) or an app bundle for MacOS from here:
• SDRPlusPlus 🔗 SDR++ on GitHub
We recommend using the release versions of the software. Since these projects are under active development there will often be nightly builds that offer additional functionality or bug fixes but may not as stable as the regular releases. Once a package is downloaded and successfully installed we can configure it for our SDR hardware.
We also recommend downloading and reading the SDR++ User Guide (see the references below).
SDR++ already supports a number of different SDR hardware devices. The RTL-SDR Blog dongle is one of them so no driver installation is needed. You just have to select the device from those in the Source dropdown menu located at the top of the display. The RTL-SDR is selected in the image to the right.
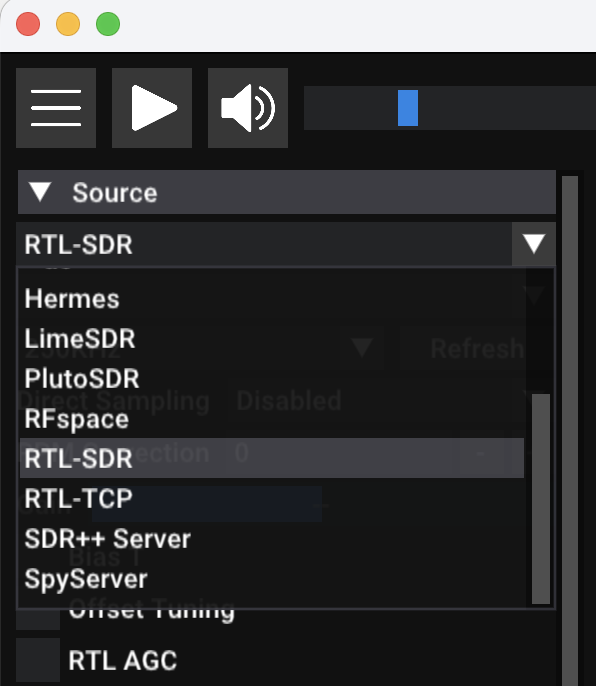
Once you have selected your hardware just click the Start/Stop icon above the Source menu to begin processing data from the SDR.
note 1: The RTL-SDR and SDR++ were chosen because of their ease of installation and use. As with most SDR programs you will still have to obtain and install the drivers for your SDR.
References:
- RTL-SDR Device Info 🔗 ABOUT RTL-SDR
- SDR++ Manual 📑 SDR++ User Guide
Note: PARC does not sell or endorse any products mentioned in these pages.
Information is provided for education and instructional purposes only.